Friday, March 30, 2012

Rocky Road Chocolate Cake


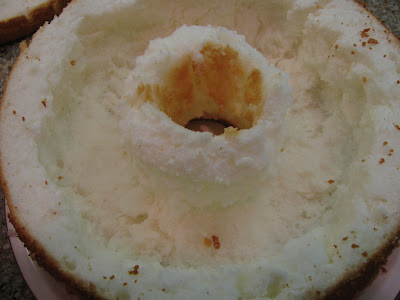
This is not a picture of the cake I made.  It does look a lot like it, however.  I have no picture because (1) I forgot to take my camera to our Sunday school cookout where it was originally served, and (2) I ate all of the leftovers when we returned home from the cookout.  I could have taken a picture back at home but I was too ravenous that it honestly never crossed my mind.  That's life these days--a starving stomach, followed by inhaling food "just to get something in", then suffering the consequences afterwards for eating too fast.  Oh, the joys of pregnancy!  Anyway, back to the cake, it was easy as pie (or cake) and cooks in a slow cooker.  It can easily be transported if you are taking elsewhere.  Also, it has a cobbler-like consistency; therefore, it's best served with vanilla ice cream.  Yummy stuff.  You've got to try it.

Rocky Road Chocolate Cake
Southern Living, October 2008

1 (18.25-oz.) package German chocolate cake mix
1 (3.9-oz.) package chocolate instant pudding mix
3 large eggs, lightly beaten
1 cup sour  cream
1/3 cup butter, melted
1 teaspoon vanilla extract
3 1/4 cups milk, divided
1 (3.4-oz.) package chocolate cook-and-serve pudding mix
1/2 cup chopped pecans
1 1/2 cups miniature marshmallows
1 cup semisweet chocolate morsels
Vanilla ice cream (optional)

  1. Beat cake mix, next 5 ingredients, and 1 1/4 cups milk at medium speed with an electric mixer 2 minutes, stopping to scrape down sides as needed. Pour batter into a lightly greased 4-qt. slow cooker.
  2. Cook remaining 2 cups milk in a heavy nonaluminum saucepan over medium heat, stirring often, 3 to 5 minutes or just until bubbles appear (do not boil); remove from heat.
  3. Sprinkle cook-and-serve pudding mix over batter. Slowly pour hot milk over pudding. Cover and cook on LOW 3 1/2 hours.
  4. Meanwhile, heat pecans in a small nonstick skillet over medium-low heat, stirring often, 3 to 5 minutes or until lightly toasted and fragrant.
  5. Turn off slow cooker. Sprinkle cake with pecans, marshmallows, and chocolate morsels. Let stand 15 minutes or until marshmallows are slightly melted. Spoon into dessert dishes, and serve with ice cream, if desired.
Note:
This cake will look like it needs to cook just a little longer, but by the time the topping is set, it's ready to serve.

Enjoy,

   Marie


Thursday, March 22, 2012

My Own Rotisserie Chicken Salad


I am finally feeling like my old self again.  I have just arrived at 15 weeks and am amazed at the abundance of energy that has suddenly returned.  I have not taken a lunch-break nap in over a week!  The nausea occasionally creeps in at night but it's only when I stuff my face at supper.  I am enjoying eating everything so unfortunately over-consumption is a nightly occurance.  I really need to exercise some self-control...

During the first trimester, Mama had to take over the blog as cooking and reading recipes literally made me gag.  At one point, I felt guilty that we were eating out every night and decided I would try to prepare an Asian dish.  My throat is tightening as I type.  I cannot speak any more of it but will admit that I am not sure I'll be able to eat Chinese or anything Asian for that matter for a very long time!  And it was weeks of take-out until I was able to move past it.

This week I had my first craving for chicken salad and weirdly enough, I wanted my own chicken salad.  I thought that was too strange how I was craving one of the few recipes I actually "created" on my own.  Nothing would do on Tuesday evening except go to Publix and buy groceries for "Marie's Rotisserie Chicken Salad."  I stayed up late making it and enjoyed the best late-night snack I've had in a while.  I hope you enjoy it as much as I do.

Marie's Rotisserie Chicken Salad
  • 2 lb Rotisserie chicken, original or savory flavor
  • 1 cup red grapes, chopped
  • 1/4 cup celery, finely chopped
  • 1/4 cup sweet onion, finely chopped
  • 1/3 cup sweet pickle relish
  • 1/2 cup + 1-2 heaping Tbsp mayonnaise*
Remove skin from chicken and pull all meat from bone (I use both white and dark meat.).  Use food processor to chop chicken to a fine consistency.  Transfer to a large bowl.  Add remaining ingredients and combine.  (Add more mayonnaise if you prefer a moister salad.)  Serve on sweet Hawaiian rolls or use Wheat Thins for dipping.  Serves approx 8.
*I often use reduced-fat mayonnaise to make the salad a little lighter.  Also, if you're from the South, you know Duke's mayo is the best :)

Enjoy!
     
      Marie

Friday, March 16, 2012

Miracle Baby and Anything Tomatoes

Jasper says, "Yay, I'm going to be a big brother! But enough with the shirt, Mom."

If you don't know by now, B and I are expecting a baby in mid-September.  He/She is our miracle baby and certainly a blessing from above.  I won't get into all of the details from the past year when we first decided we were ready to take on the journey of parenthood but I will sum it up by saying that things have not been normal with this ole (young) gal since that time.  We were basically told that our chances of becoming pregnant on our own were slim to none.  I will conclude by telling you that things still weren't normal when our baby was conceived but our loving and gracious God intervened without us having to resort to medications or infertility treatments.  My prayer since February of last year was that God would allow me to one day become a mother and if it wasn't going to happen on my timeline, I asked that he would grant me an understanding and peace.  And most of all I prayed that I would stand strong in my faith, trusting in him always (that's tough sometimes, you know?).  A year later, God graciously fulfilled my desire; however, my prayer has not changed.  I realize now more than ever that all I can do is rely on my faith in our God who is all-powerful, all-knowing, and loves me more than anyone. 

And speaking of timing, Baby Berryhill is due two weeks before B and I were to leave for the Cinque Terre, one of Italy's finest treasures.  This twelve-day trip was being planned as B and I decided that if a baby was not in our future then an extravagant trip should be and we had big plans to see the world.  Wow!  We look back and laugh, realizing that traveling would have been fantastic but how much more rewarding the journey of parenthood will be (and saved me from splurging on a Louis Vuitton backpack:) ). 

So what do tomatoes have to do with all of this?  Everything!  They've been the most pronounced craving thus far and I can't seem to eat enough.  I remember a distinct hormonal moment early on--I cried when I finished my Subway sandwich because the tomatoes were gone and I knew I couldn't get another one until the next day.  Pitiful.  I have already consumed enough salsa to fill a gallon jug.  When the tortilla chips are gone, I have been caught eating the remaining salsa by spoonfuls straight from the container.  Any salsa will do but Publix brand is by far the best.

Last night we had our dear friends, the Hayes', over for dinner.  They are expecting their second baby any day now and we really enjoyed a relaxing evening together, sharing a meal and catching up before life gets hectic again.  I prepared a chicken and grits dish, which included tomatoes, of course, and it seemed to be a big hit.  I made it several times last year but remembered how delicious it was as I stumbled upon it this week in my recipe binder.  It's so simple, all ingredients go into a slow-cooker and all you need to add is a green side dish and bread and you have a meal.  The recipe calls for boneless-skinless chicken thighs and although that's all I've ever used, I feel certain that breast meat will work just as well.  For our readers in Jefferson County, watch for sales at Ingles and IGA as they often have boneless/skinless thighs on sale.  They are usually more expensive than breasts if you pay full price.


Southern Slow Cooker Chicken and Grits
Adapted from Weight Watchers

1 3/4 cup chicken broth
6 Tbsp uncooked corn grits
1 Tbsp olive oil
1 small onion, diced
1/2 tsp jarred minced garlic
1 cup sliced mushrooms
1 Tbsp jalapeno peppers, canned (can use less or more depending on desired heat)
1 medium sweet red pepper or yellow pepper, chopped
1 - 14.5 oz can diced, fire-roasted tomatoes
1/4 tsp ground cumin seed
1/2 tsp salt
1/4 tsp black pepper
1 pound boneless, skinless chicken thighs, cut into 1-inch chunks

Place broth in a 3- to 5-quart slow cooker.  Slowly add grits, stirring constantly, to avoid lumps; set slow cooker aside.

Heat oil in a large skillet over medium-high heat.  Add onion, garlic, mushrooms, jalapeno and red/yellow pepper; saute, stirring frequently, about 5 minutes.  Add vegetables to slow cooker. Place tomatoes, cumin, salt and black pepper in slow cooker; stir to mix.  Add chicken thighs; cover and cook at medium setting for 5 to 6 hours. Yields approx. 4 servings.

Enjoy,

Marie

Friday, March 9, 2012

Preachin' and Joe Pundt's Banana Puddin'

In our family owned pharmacy all customers are appreciated. However, we particularly enjoy the ones who hang around to talk and joke with us after their business is done. One such "character" is Mr. Joe Pundt or "Joe Punch" as hubby calls him. We especially appreciated Mr. Joe the day he walked in with a large pan of banana pudding. We dove into that pudding faster than ducks take to water!
 
 
Mr. Joe never forgets anything so we know better than to let him "get anything on us" or we will be mercilessly teased about it. One such time was right after we took in a homeless puppy. By no stretch of the imagination was Prissy a cute puppy. We don't know how it happened but she had lost one of her eyes and would have died but for the Good Samaritan who rescued her. Despite her looks, we quickly came to love her.
 
 
Mr. Joe knew about Prissy and mentioned that he was looking for a pet. Thinking I would tease him a little I said I knew he really wanted Prissy but he couldn't have her. Without batting an eye, Mr. Joe responded that he wanted a dog with TWO eyes! I had no comeback for that and I still don't when he occasionally reminds me of it.
 
 
What does this have to do with preachin'? Our church had a guest speaker last Sunday,and to be hospitable, we planned to have a covered dish meal after the service. Have you ever been to a church dinner and not had banana pudding? I mean, some things are just understood. This time I was the bearer of the banana puddin'!
 
 
While I am a fan of the traditional banana pudding, I am not averse to variations on a theme. This recipe is quick, easy, and totally satisfying when you have a craving flung on you. You can trim off calories by using sugar-free pudding, and reduced fat sour cream, condensed milk, whipped topping, and vanilla wafers.


Joe Pundt's Banana Pudding
1 5oz pkg. instant vanilla pudding
2 cups milk
1 8oz. sour cream
1 14oz condensed milk
2 8oz whipped topping, thawed
6 to 7 bananas, sliced
Vanilla wafers
In a large bowl, mix sour cream and condensed milk. Add the 2 cups milk and pudding, beating well with an electric mixer or whisk until mixture is blended and is thickened. Fold in 1 of the 8oz. whipped toppings, a small amount at a time until incorporated. Spread a thin layer of pudding mixture in the bottom of a 13x9 dish. Top with a layer of vanilla wafers then a layer of bananas. On top of bananas, evenly spread half of the remaining pudding. Repeat with another layer of vanilla wafers, bananas and finishing with rest of pudding. Refrigerate until set. Top with remaining whipped topping before serving. Serve with a mischievous smile and a twinkle in your eye the way Mr. Joe would do it!
 
 
Happy cooking!
Nan

Tuesday, February 28, 2012

When is Dinner "Lunch" and Supper "Dinner"?


 Have you ever debated this question? I remember that, as a child, only the meal we ate at school was called "lunch." As in, "Are you eating lunch in the cafeteria today?" So I was confused when I heard people refer to dinner as lunch or supper as dinner. My mother finally explained that some people called it that way but she couldn't say why. It never sounded quite right to me and I guess it didn't to her either.
 
When I was young, my mother's father owned a small grocery store. Gramps did not leave the store at noon to come home and eat "lunch." Rather, he came in to enjoy the largest meal of the day prepared by my grandmother, Nannie. He sat down to a meat and 3 vegetables, bread, and sometimes, dessert. After resting for a bit, Gramps returned to the store, fortified for the rest of the work day. The evening meal, or supper, was a lighter repast of leftover vegetables from lunch, a sandwich, or crumbled cornbread in a glass of buttermilk.

 In our home today the midday meal is called "lunch" and the evening one"supper."  There is one exception....Sunday dinner, the meal served after church. It is, hands down, my favorite meal of the week. I love all that the words imply...good food, time with family, lively conversation.

 Until a few years ago, my mother-in-law was the cook for Sunday dinner with my occasional contribution of a dish or two. Now the pleasure is mine. On most Sundays, you will find the Gunn family gathered around our table, laughing, talking, and catching up with what has happened to one another since the last Sunday.  It is a special time made even more so when Marie and "B' join us.
  
Of course, Sunday dinner is more about being together than it is the food served. Nevertheless, I really enjoy preparing dishes that are Gunn family favorites, such as, a recent meal of stuffed green peppers. This is a dish my mother-in-law often made when she was able to cook and I attribute this particular recipe to her.
  
It really doesn't matter what you call the meal or the day of the week it is served. Even the simplest food can become special and memorable when family gathers around the table. And a compliment such as,"this tastes just like Mama used to make," is worth more than a mink coat and feels just as good!

Sallie's Stuffed Green Peppers
4 medium green peppers
1 lb. ground beef
1 small oinion, chopped
1 cup cooked white rice
2  8oz cans tomato sauce
salt, pepper, garlic powder to taste
shredded sharp cheese

Cut off tops of peppers and remove ribs and seeds. Drop in boiling water to cover and cook 3 to 5 minutes until slightly tender. Drain well. Brown ground beef and onions together. Drain off fat. Mix in 1 can tomato sauce, rice, and seasonings. Pour other can of tomato sauce evenly over bottom of baking dish. For four peppers an 8 in square pan should do. Place peppers on top of sauce and stuff with meat mixture. Top with cheese and bake at 375 until cheese melts and peppers are done, about 15-20 minutes. Spoon sauce from pan over peppers when serving.

**Nan's notes: I usually have some meat mixture left over which I put in an ovenproof dish, top with cheese and bake along with the peppers. Son John thinks I do this just for him!
Also, the peppers used in the photograph above were especially large so I cut them lengthwise and stuffed with the meat mixture. It worked very well.

Happy cooking!
Nan

Tuesday, February 7, 2012

Fast Fish and Friendly Folks


Hello friends! I am sorry to have been so long in adding a post to Our Friend Oven. My days are so very busy and, while I am doing a lot of cooking for my family, it is not always worthy of sharing with you. You know how it is. Sometimes a girl is fortunate to just get something on the table to hold body and soul together until time for the next meal!

Today's recipe is a favorite and quick go to dish when time is short. You can use any type of skinless fish fillet. I use tilapia because I buy bags of individually frozen fillets from Sams Club. It is so easy to take out the number pieces you need for the meal and the filllets thaw quickly.

The recipe for Heavenly Fish Fillets came to me from dear friends who live on the Georgia coast, Fred and Mary Alice Newlin. Back in the "good ole days" of pharmacy, representatives from drug manufacturers made calls on pharmacies, taking orders, picking up out of date bottles, etc. We saw these people so often they became friends. "Mr. Fred" was one such friend. Being an avid fisherman, he often had photographs of his latest catch and loved to share them with us. I am not sure exactly how it all came about, but hubby accepted an invitation from Mr. Fred to come down to his house and do some fishing in the intercoastal waterways. Hubby took another friend with him and they had such a good time that a lasting friendship was forged with the Newlins.

Sometimes the wives and children would accompany the hubbies on their trips down to fish with Mr.Fred. We would stay at the house with "Miss" Mary Alice who thrilled the children by making homemade play dough. The Newlins did not own a television but that didn't mean we got bored there. There were plenty of toys to occupy the kids while Miss Mary Alice shared her latest craft project with us ladies. When the guys returned home with their catch of the day, Miss Mary Alice would have supper on the large round dining table. Holding hands around the table, Mr. Fred would say the blessing, ending with a hearty "Amen, and we pass to the right!"

It has been years since we have visited the Newlins. I still remember the quiet, peaceful setting of their home on Jericho Island and how they opened it and their hearts to us. Every time I prepare Heavenly Broiled Fish from the recipe written in Miss Mary Alice's own hand, I think of those dear, sweet people.

Heavenly Broiled Fish
2 lbs skinless fish fillets
2 tablesoons lemon juice
1/2 cup grated Parmesan cheese
1/4 cup softened butter
3 tablespoons mayonnaise
3 tablespoons chopped green onions with tops
1/4 teaspoon salt
dash liquid hot pepper sauce
Place fillets in a single layer in a well greased baking pan, such as a cookie sheet with sides. You can line the pan with aluminum foil to make cleanup much easier. Brush fillets with lemon juice and let stand for 10 minutes. Combine remaining ingredients. Preheat oven to "broil" and broil fish 4 inches from heat approximately 6 to 8 minutes. Remove fillets from oven and spread cheese/butter mixture evenly over fish. Return fish to oven and broil 2 to 3 minutes until fish flakes and is lightly browned.
*Note: number of fillets and amount of topping can be adjusted for number of servings desired.

Happy cooking,
Nan

Thursday, January 19, 2012

Strawberry Cream Cake

Strawberries happen to be one of my favorite fruits. You can do a million different things with them. I am beginning to see them appear in grocery sale papers, marking the start of their season.  My father-in-law takes frequent fishing trips to an area of Florida where strawberries are grown and are ripe in the early spring. On his way home he likes to stop at roadside produce stands and buy some of the Sunshine State's bounty. We like it because he generously shares what he brings home....ripe tomatoes, Indian River grapefruit, several varieties of oranges, and red, juicy strawberries.

I always feel rushed to use up the strawberries while I have them and today's recipe is one of my favorite ways to do it. The actual preparartion and assemly of the cake is not difficult. But the process requires some time, i.e., cooling of the angel food cake and refrigeration time. Calories can be shaved off by using reduced or fat free ingredients. I will print the recipe as written and in parentheses I will put the lower calorie alternatives.


I like to make the angel food cake as opposed to buying a ready made one because it yields a larger cake.  I used to be intimidated by angel food cake but nothing can be easier than a Duncan Hines mix....no eggs, oil, etc. You only add water to the mix and let the mixer go to it for a few minutes. You don't even have to grease and flour the pan. On the contrary, beaters and bowl and pan should be grease free as any oils prevent the incorporation of air which gives the cake its fluffiness. The cake in the pan is turned upside over a bottle to cool for an hour and a half. I use a wine bottle for this purpose.

Slice off the top of the cake and put aside.


Using a serrated knife, cut one inch from the center hole and side of cake. Use a "sawing" action with the knife as the cake does not cut cleanly. With your fingers, pull out pieces of cake to form a tunnel. Be careful to leave the side and bottom intact.

Mix the cake pieces with strawberries, cream cheese, condensed milk, lemon juice, and almond flavoring.

Fill in the tunnel with mixture and replace the top. Frost with Cool Whip and decorate with sliced strawberries if desired.


Strawberry Cream Cake
1 (14.5oz) package white angel food cake mix
1 (8oz) pkge cream cheese (or 1/3 less fat), softened
1 (14oz) can sweetened condensed milk (or fat-free)
1/3 cup lemon juice
1/2 teaspoon almond extract
2 cups sliced fresh strawberries
1 (8oz) carton frozen whipped topping, thawed (or lite variety)
Additional strawberries for decoration
 Prepare angel food cake according to package directions, using a 10-inch tube pan. Invert pan on funnel or bottle for 2 hours or until cake is completely cooled.
 Loosen cake from sides of pan using a small metal spatula. Remove from pan; cut a 1-inch slice crosswise from top of cake and set top aside. Cut 1 inch from center hole and outer edge of cake with a sharp or serrated knife.Carefully remove center of cake, gently pulling cake pieces out with fingers, leaving a 1 inch layer of cake on bottom. Reserve cake pieces.
 Beat cream cheese until light and fluffy. Add condensed milk; mix well. Stir in lemon juice and almond extract. Fold in cake pieces and strawberries; spoon into tunnel in center of cake. Top with reserved cake slice. Chill 8 hours or overnight. Frost with whipped topping and garnish with additional strawberries.

Happy cooking!
Nan

Wednesday, January 11, 2012

Chicken Burgers: A Healthy Alternative


I love a good hamburger.  I also love grilled chicken.  Combine the two and you have "Chicken Burgers".  This recipe's original name is Blue Cheese Chicken Burgers (from Weight Watchers) but rarely do I add the blue cheese.  My philosophy is why waste the calories when the burger is just as good without it.  Brandon usually ends up adding his preferable slice of cheese so what the heck, just add what you like.  Be warned, though, don't expect to bite into this burger and taste beefy goodness. No, it is made with ground chicken, which is a much different.  However, I think you'll find that after a few bites you'll be satisfied with the "burger taste" and turn into a more delightful person knowing that you've eaten way less calories.  This recipe is perfect to share for the new year when weight-loss resolutions are at a peak.

Chicken Burgers
Adapted from Weight Watchers
Serves:  4

Cooking spray
1/4 cup favorite BBQ sauce
1 1/2 tsp hot pepper sauce, or to taste
1 pound uncooked extra lean ground chicken breast
1/2 cup scallions, sliced
1/4 cup celery, chopped
1/4 cup bread crumbs, plain-variety
2 tsp minced garlic
1/2 tsp table salt
4 mixed-grain hamburger rolls
lettuce, tomatoes, cheese of choice

Off heat, coat grill or grill pan with cooking spray; preheat to medium-high.

In a small bowl, combine BBQ sauce and hot pepper sauce. In a medium bowl, combine chicken, 1 tablespoon of BBQ mixture, scallion, celery, bread crumbs, garlic, and salt. Using wet hands to prevent mix from sticking, form chicken mixture into four 1/2-thick patties; brush top of burgers with some remaining BBQ sauce mixture.

Place burgers on grill, sauce side down. Brush tops of burgers with remaining sauce. Grill, turning once, until cooked through, about 10 minutes. Lightly toast open-faced buns on grill during last minute of cooking.


Enjoy,

Marie

Friday, January 6, 2012

Too Prissy to Hunt? I Don't Think So!

I surprise many people when I tell them that I am a hunter.  They stand amazed with their mouths open, speechless, and I know what they're thinking..."You're too prissy to hunt." 

I'll let you decide for yourself...


That's me at a dove shoot with  In Style magazine in my left hand and my 20 gauge in my right.  How's that for prissy?!?!

My favorite hunting is deer hunting; although, during Christmas break I had the opportunity to hunt waterfowl and that was really cool.  My hunting days began when I about ten years old in Bartow, Georgia.  Before then, I would help my grandaddy at his hunting club prep the deer stands during the pre-season.  We would go up and down the stands, cleaning windows and carpet and replacing chairs.  A fall from the top of one of his tower stands, which resulted in a broken wrist, didn't halt my interest in hunting and it was a few years later when I asked my grandaddy if I could go hunting with him.  Well, if you know my Grandaddy Gunn well, you won't be shocked when I say that the very next day I was the proud owner of a 243, junior rifle, with a nice scope mounted on top, a ditty bag, and a plethora of camouflage.  I will never forget the first time we set out for the woods.  I was nervous as heck as my grandaddy sat me down in his cookhouse and drew a picture of a deer.  Above and a little to the right of the deer's front leg, he drew a bulls-eye (I am laughing hysterically as I write, thinking back to that day!).  Grandaddy told me if the cross-hairs in my scope were situated on that spot, all I would have to do is pull the trigger and I'd have me a deer.  Well, won't you know that I have knocked down every one since.  I like to call it "the sweet spot."  Thanks, grandaddy.

My grandaddy has taught me lots of other great things about hunting, including how to scan the food plots slowly and with minimal movement as I turn my head, how to use my peripheral vision, where to place binoculars, that it's okay to snooze but remember I may lose, and that I should only place one bullet in the chamber at a time (that's for scatter-brained people like me who often "forget".).  More importantly, he has also taught me that hunting should not just be about shooting animals but instead having meat for food.  I have tried to remember that over the years.  However, I have failed until recently at cooking venison and other game as I have not been able to find recipes that take out enough of the "gamey" taste.  Thanks to our sweet neighbors here in Augusta, who have encouraged me and given several recipes, I gave it another try and was successful.  This recipe I am sharing is wonderful and by marinating the venison overnight followed by slow-cooking all day the wild taste is barely noticeable.

Slow Cooker Venison
www.food.com
  • 3 to 4 pounds boneless venison roast (I used a backstrap)
  • 1/2 cup vinegar, plus
  • 1/3 cup vinegar
  • 7 teaspoons salt
  • 7 garlic cloves, chopped (I substituted with jarred minced garlic)
  • flour
  • 2 tablespoons vegetable oil
  • 1 large onion, sliced
  • 3 tablespoons brown sugar
  • 1 1/2 teaspoons dry mustard
  • 3 tablespoons Worcestershire sauce
  • 1 (14 oz) cans tomatoes, chopped
  1. Put the roast or backstrap in a deep bowl.
  2. Make a marinade using 1/2 cup vinegar, 2 tablespoons of the salt, and 4 cloves of chopped garlic.
  3. Pour the marinade over the roast, adding enough water to cover the venison; cover and refrigerate overnight.
  4. Remove venison from the marinade and pat dry.
  5. Sprinkle the meat with the remaining teaspoon of salt and dredge with flour.
  6. Heat oil in a heavy skillet and brown the roast on all sides.
  7. Transfer the roast to a crock-pot and add the sliced onion.
  8. In a bowl, mix the brown sugar, mustard, 3 tablespoons of flour, and the Worcestershire to a paste; stir in the tomatoes, the remaining 1/3 cup of vinegar, and 3 cloves of chopped garlic; dump this mixture over the roast in the crock-pot.
  9. Cook on LOW setting for 8-10 hours, until tender.
  10. Allow about 5 minutes to set before cutting. Serve with rice. Can also add potatoes and carrots.

Enjoy!

Marie

Sunday, January 1, 2012

Pineapple Casserole. It's a Personal Thing.


I know someone (a special someone) who has a relationship with pineapple casserole.  This is a love-love relationship no doubt.  The date when these two first got hooked up is unknown but that's not what matters.  What matters is this special person loves pineapple casserole so much that he will eat it for breakfast (and he NEVER eats breakfast), lunch, and dinner if there's leftovers.  In 2008, this someone married another someone who made this casserole for him at least once a week.  Unfortunately, after a month or two, the cookings decreased due to body fat increase.  Recently, it was prepared for friends at the hunting club and as my special someone sat down with his plate of food, I bet you'd never guess what he bit into first?  Let's just say that he had secretly been experiencing withdrawals and I kind of felt an instant of guilt.  I'm not going to reveal this someone's identity as I would hate to embarrass him but as I write this post, I will admit that I am not sure how I've blogged for almost six months and this recipe has not been featured.  Oh well, just make it and you'll see why it's loved so much.

Pineapple Casserole
Adapted from The Ultimate Southern Living Cookbook, 1999
  • 2 (20 oz) cans pineapple chunks in juice, undrained
  • 1 cup sugar
  • 6 Tablespoons all-purpose flour
  • 2 cups (8 oz) shredded sharp Cheddar cheese
  • 2 - 2 1/2 cups buttery cracker crumbs (we use Ritz)*
  • 3/4 stick butter, melted
Drain pineapple, reserving 3/4 cup (or just a shade more) juice**.  Combine sugar and flour; stir in reserved pineapple juice.  Stir in cheese and pineapple chunks.  Spoon mixture into a greased 2-quart casserole. 

Combine cracker crumbs and melted butter, stirring well; sprinkle over pineapple mixture.  Bake, uncovered, at 350 degrees for 20 to 30 minutes or until top is browned.  Serve hot.  Yields:  8 servings

*Crackers can easily be crushed in unopened sleeve. Helps prevent making a big mess!
**Save remaining juice and add to iced tea; makes a refreshing drink, especially in the summertime.